 Save
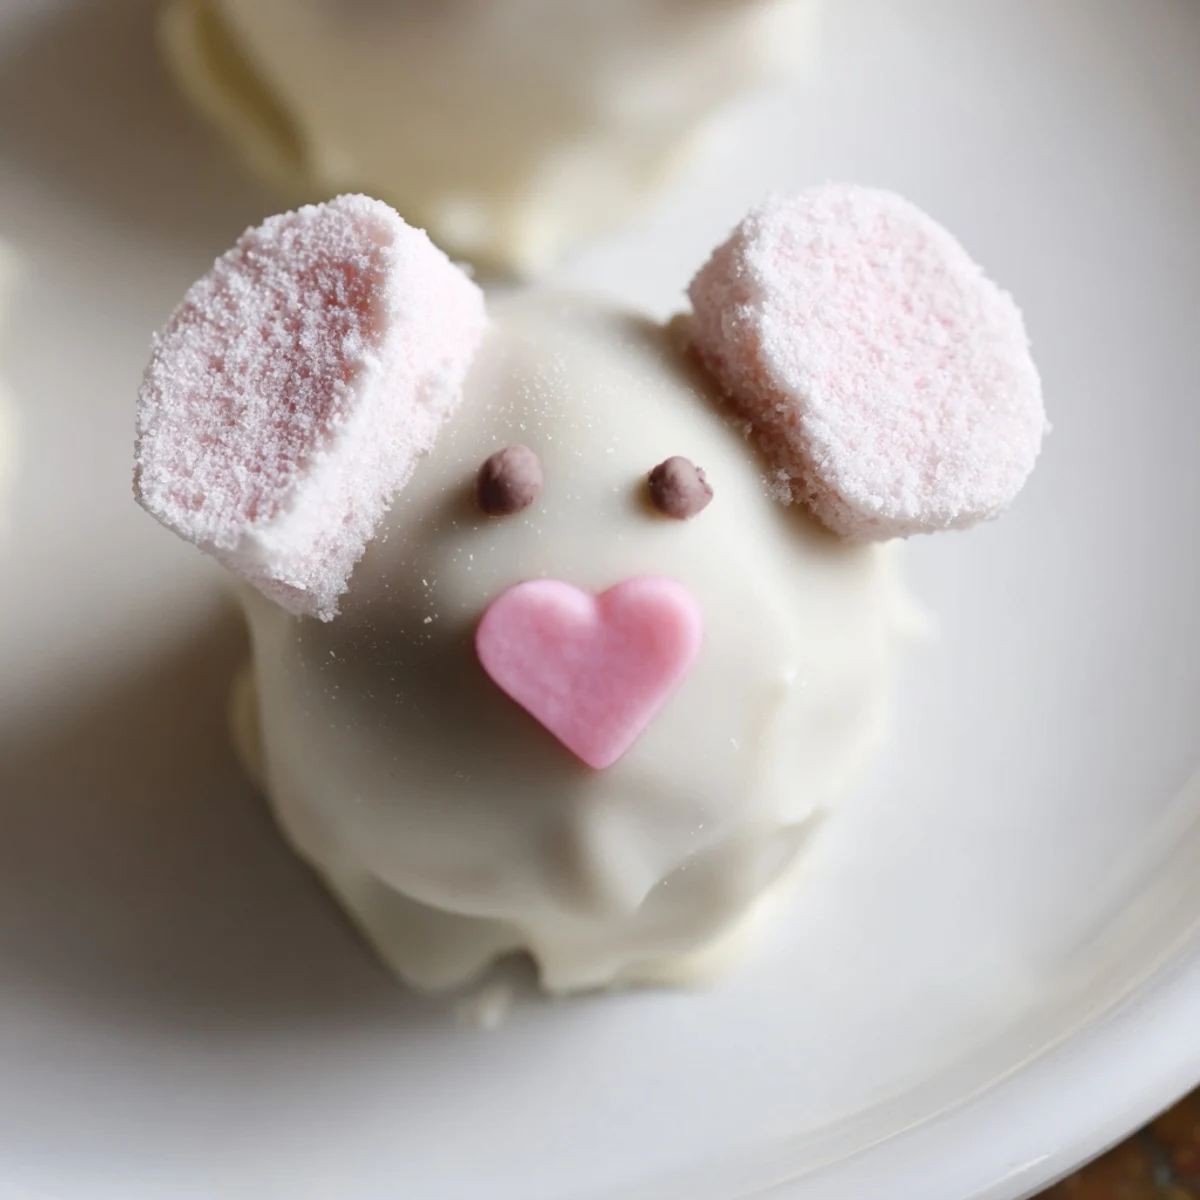
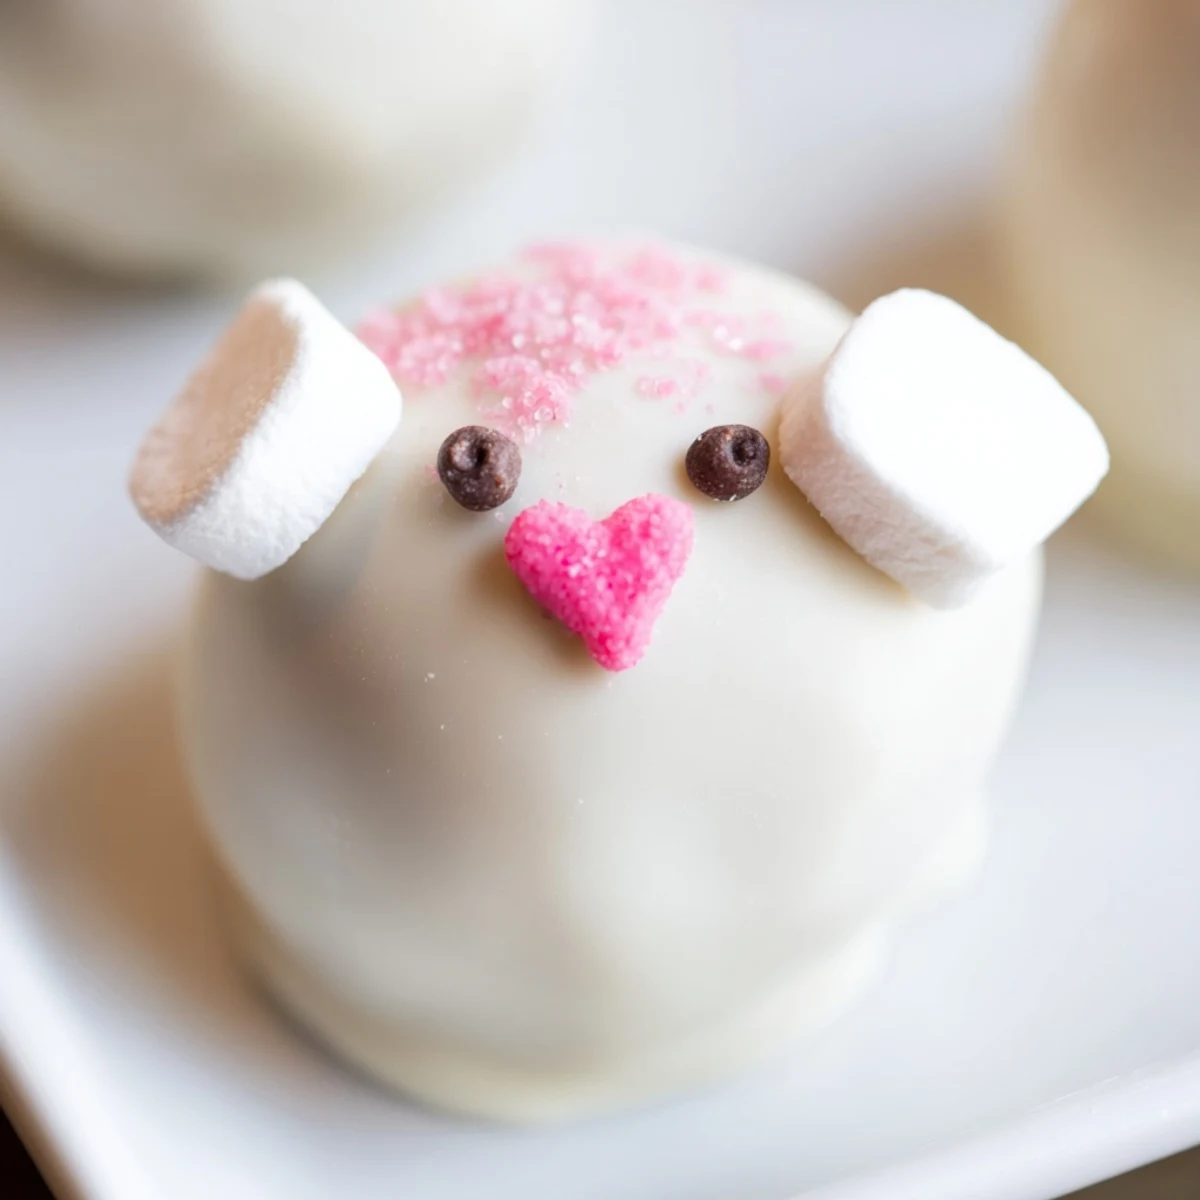
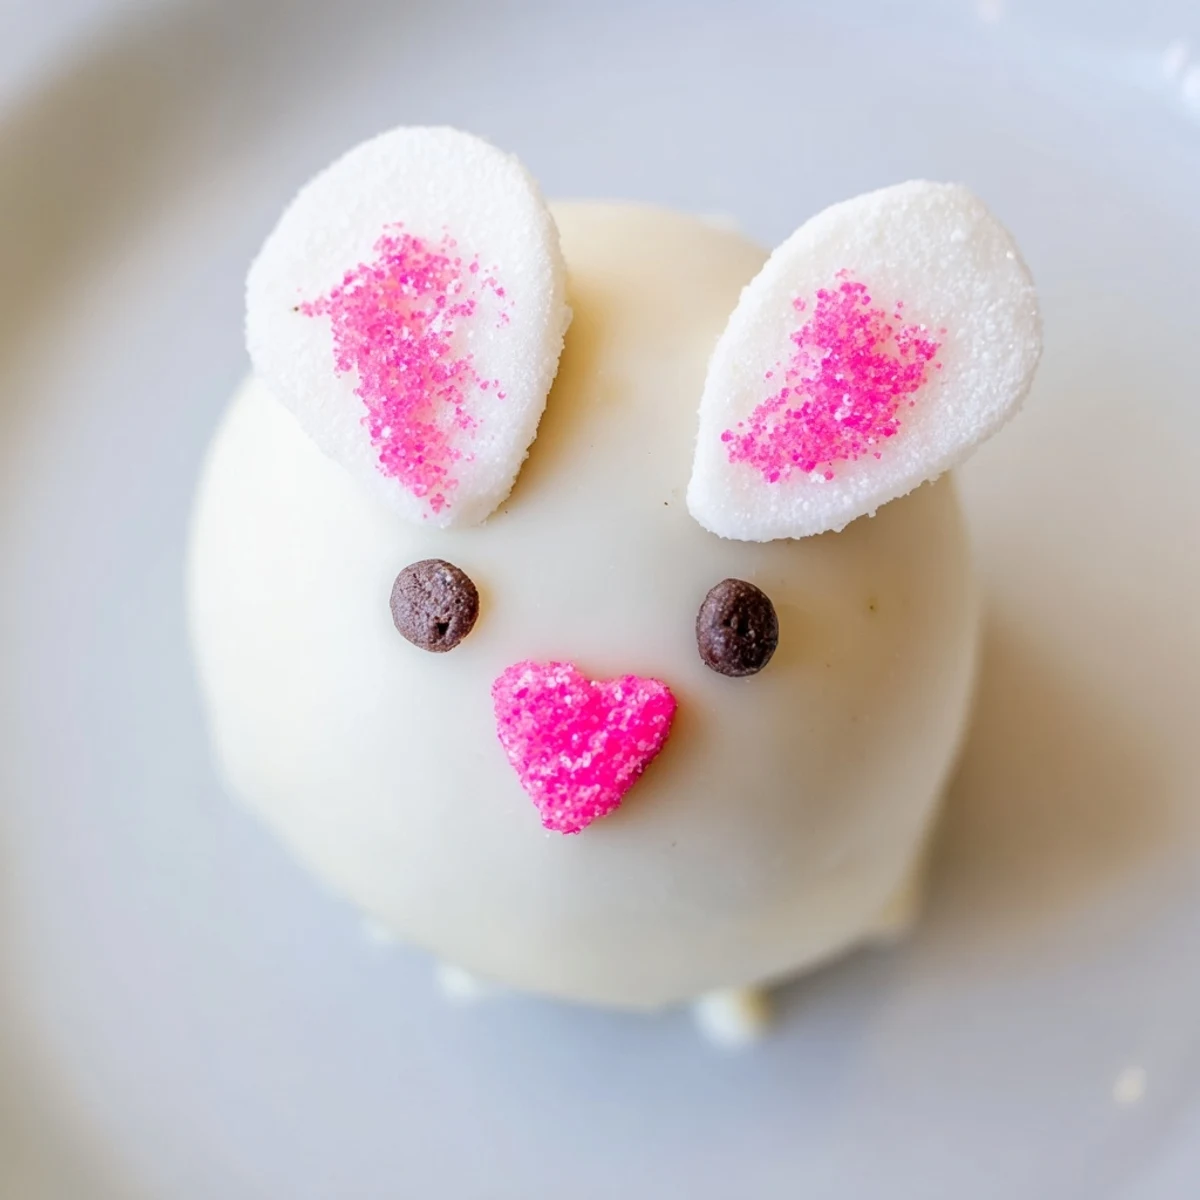
Save These adorable bunny-shaped treats combine crushed Oreo cookies with cream cheese for a rich, creamy filling. Each ball is dipped in smooth white chocolate and decorated with mini marshmallow ears, candy eyes, and pink noses to create charming Easter bunnies. The no-bake preparation makes them perfect for busy spring celebrations, while the fun decorating process is enjoyable for all ages.
Last Easter, my kitchen looked like a tiny marshmallow factory had exploded everywhere. I had pink sugar on my nose, white chocolate smeared across my apron, and about three dozen eager little bunny faces staring back at me from the counter. My youngest kept sneaking the mini marshmallow ears while I tried to work, which explained why my bunnies kept looking rather one-eared. Sometimes the messy baking sessions become the ones everybody talks about for years afterward.
I first made these for a school spring festival when another mom mentioned how much time she spent baking individual cupcakes for every classroom party. Watching her face light up when I brought in this tray of cute little bunny faces was genuinely heartwarming. Now whenever spring rolls around, my own kids start asking when the bunny balls are coming back.
Ingredients
- 36 Oreo cookies: These chocolate sandwich cookies create the perfect crumbly base that holds everything together beautifully
- 225 g cream cheese softened: Room temperature cream cheese blends seamlessly into the Oreo crumbs forming that irresistible fudgy texture
- 400 g white chocolate or candy melts: White chocolate coating provides a smooth canvas for all those adorable bunny features to really pop
- 48 mini marshmallows: Sliced diagonally these become the perfect floppy bunny ears that everyone loves
- Pink sanding sugar or edible gel: Adds that sweet rosy detail inside the ears and on little bunny noses
- 48 mini chocolate chips or edible marker: Tiny dots for eyes bring each bunny personality to life instantly
- 24 pink heart sprinkles: Heart shaped noses make these bunnies look positively precious
- 24 mini white marshmallows: Optional fluffy tails add one more irresistible touch
Instructions
- Prep your workspace:
- Line a baking sheet with parchment paper so the balls do not stick while chilling
- Make the crumb mixture:
- Pulse Oreos in a food processor until fine crumbs form then add softened cream cheese and blend until thick dough comes together
- Shape the bunnies:
- Scoop tablespoon portions and roll into balls placing them on your prepared baking sheet
- Chill thoroughly:
- Freeze the balls for 20 to 30 minutes until completely firm before dipping
- Melt the coating:
- Heat white chocolate in a microwave safe bowl stirring every 30 seconds until completely smooth
- Dip each ball:
- Use a fork to lower each chilled ball into chocolate let excess drip off and return to the baking sheet
- Add those adorable faces:
- Work quickly before chocolate sets by pressing on marshmallow ears pink sugar details eyes heart sprinkle noses and fluffy tails
- Set completely:
- Refrigerate finished bunnies for at least 30 minutes until the coating is firm
 Save
Save Something magical happens when you set out a plate of these at a spring gathering. Adults and children alike gravitate toward them pointing out their favorites and laughing at the lopsided ears. Food that makes people smile before they even take a bite is always worth the effort.
Working With White Chocolate
White chocolate can seize and turn grainy if even a tiny drop of water gets into the bowl while melting. I keep a dry spoon dedicated solely to stirring melted chocolate and never cover the bowl with a wet lid. Patience during melting pays off with that gorgeous smooth finish that makes decorations stick perfectly.
Assembly Line Strategy
Set up separate bowls with each decoration before you start dipping so you can work quickly through each bunny. I arrange everything in order from ears to eyes to noses to tails so my hands develop a rhythm. The first few might look a bit experimental but by ball number ten you will be decorating like a pro.
Make Ahead Magic
These store beautifully in the refrigerator for up to a week which makes them excellent party prep candidates. I have made them three days before an event and they tasted just as fresh and adorable as the first day. Having dessert ready early removes so much stress from hosting.
- Layer them between parchment paper in an airtight container to prevent sticking
- Bring to room temperature about 15 minutes before serving for the creamiest texture
- Extra pink sanding sugar makes a beautiful garnish on the serving platter
 Save
Save These little bunnies have become the most requested treat in my house. Watching faces light up when people spot them never gets old.
Common Questions
- → How long do bunny Oreo balls keep?
-
Store these in an airtight container in the refrigerator for up to one week. They can also be frozen for up to three months—thaw in the refrigerator before serving.
- → Can I make these ahead of time?
-
Yes! Prepare the Oreo balls and freeze them undecorated for up to two weeks. When ready, dip in chocolate and decorate. The finished treats keep well in the refrigerator for several days.
- → What if I don't have a food processor?
-
Crush Oreos in a sealed plastic bag using a rolling pin or meat mallet. Mix with softened cream cheese by hand until well combined. The texture will still be excellent.
- → Can I use dark or milk chocolate instead?
-
Absolutely! While white chocolate provides the classic bunny look, milk or dark chocolate works perfectly for dipping. Consider adding a white chocolate drizzle for contrast.
- → Why do the balls need to freeze before dipping?
-
Freezing firms the mixture, making it easier to dip without falling apart. It also helps the chocolate coating set quickly and evenly, giving a smooth finish.
- → What other decorations can I use?
-
Try colored candy melts in pastel shades, shredded coconut for tails, edible glitter, or use different sprinkles and candies to create unique bunny personalities.