 Save
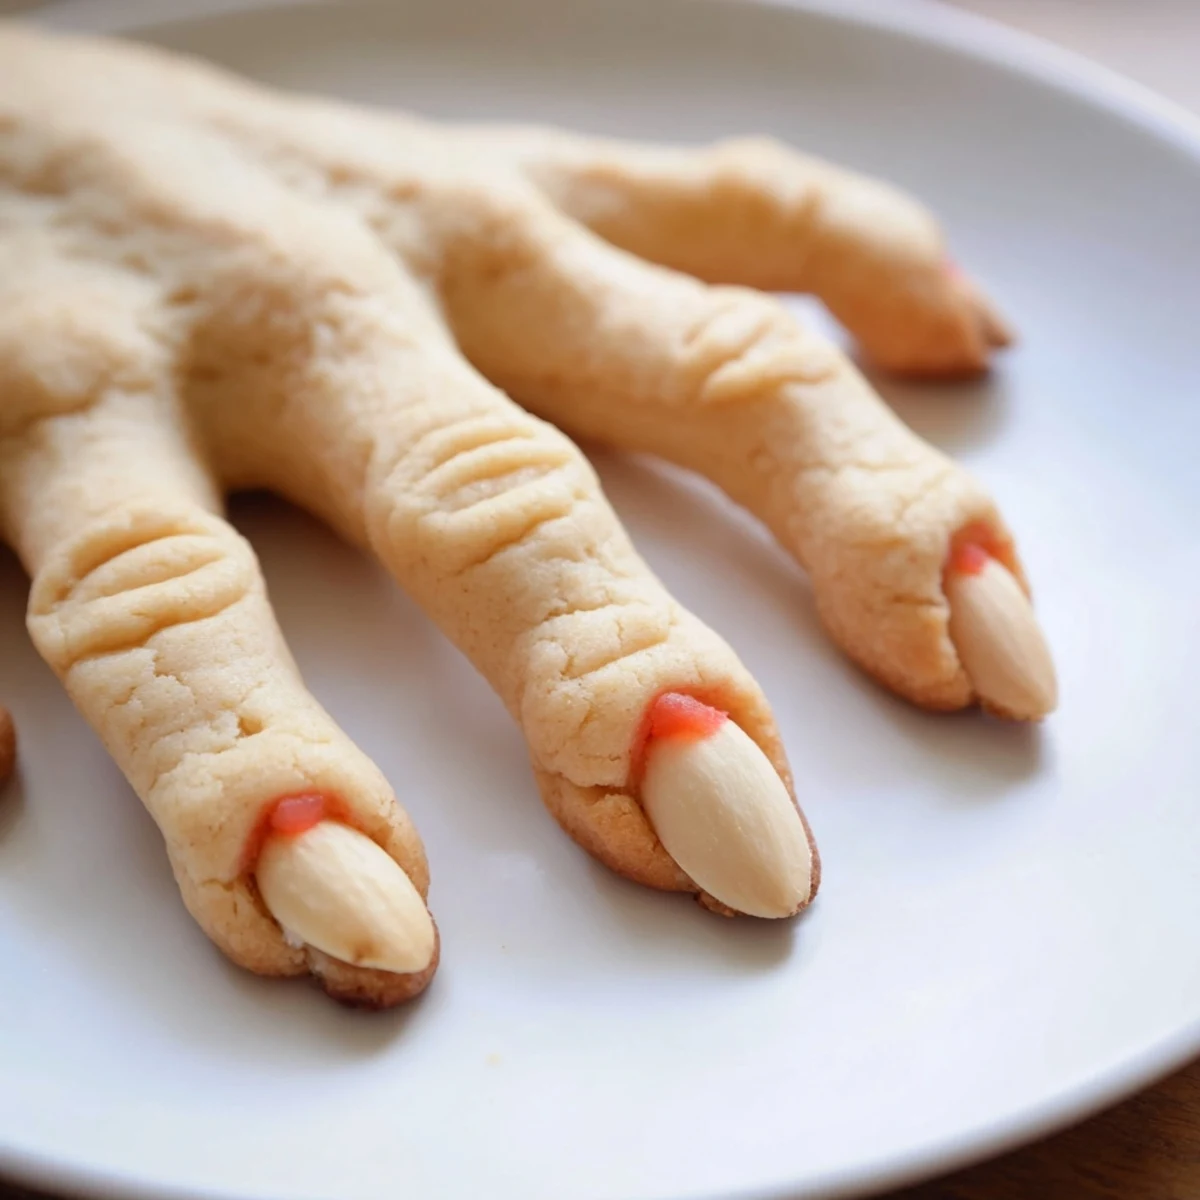
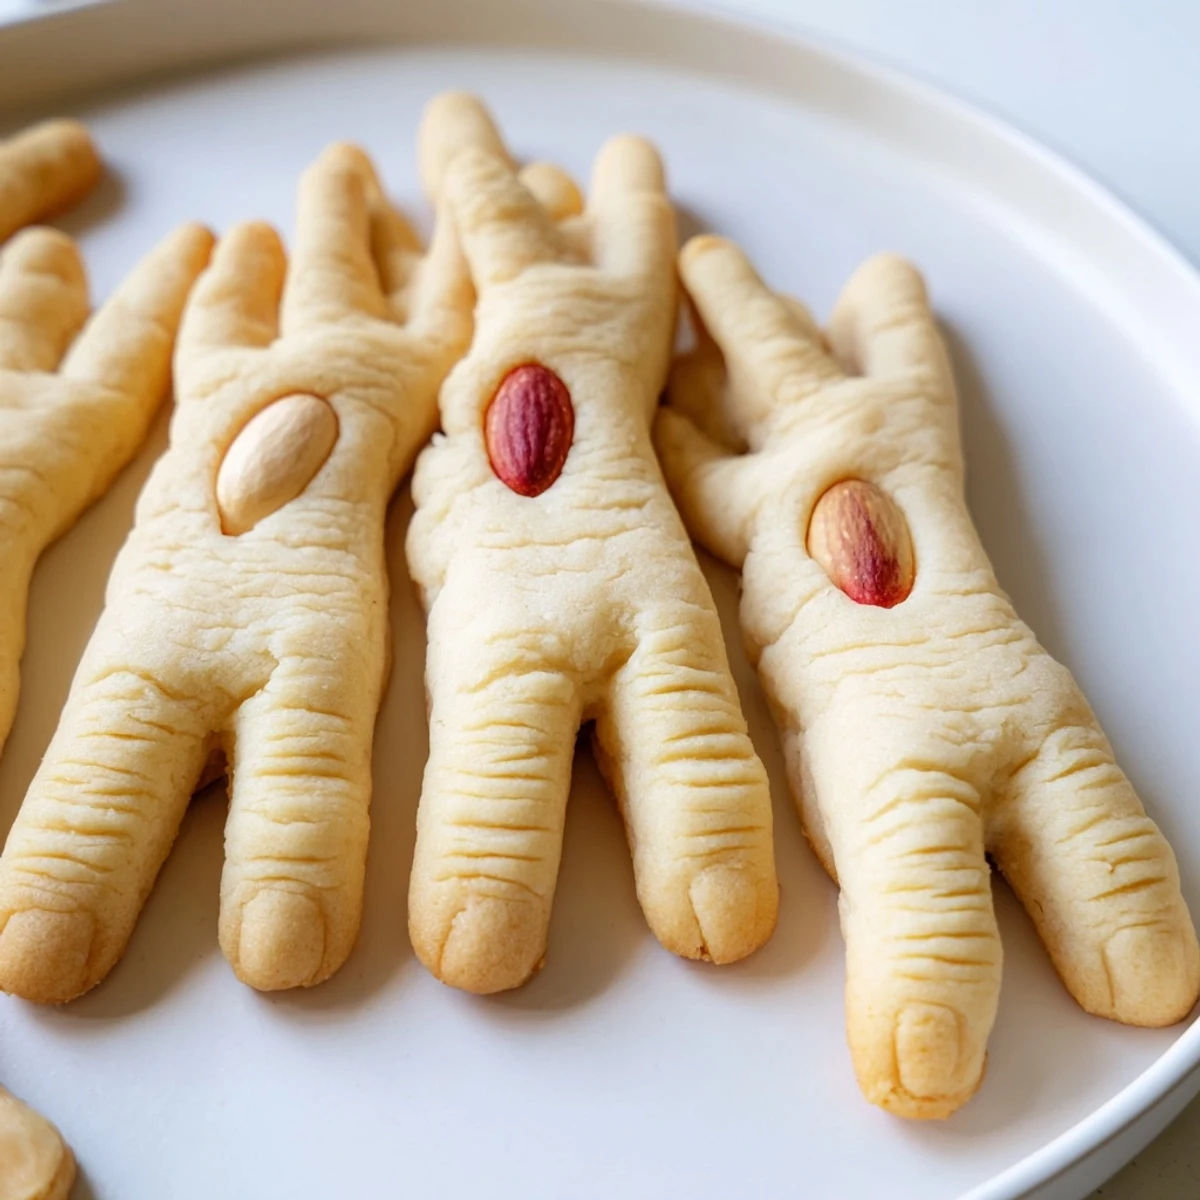
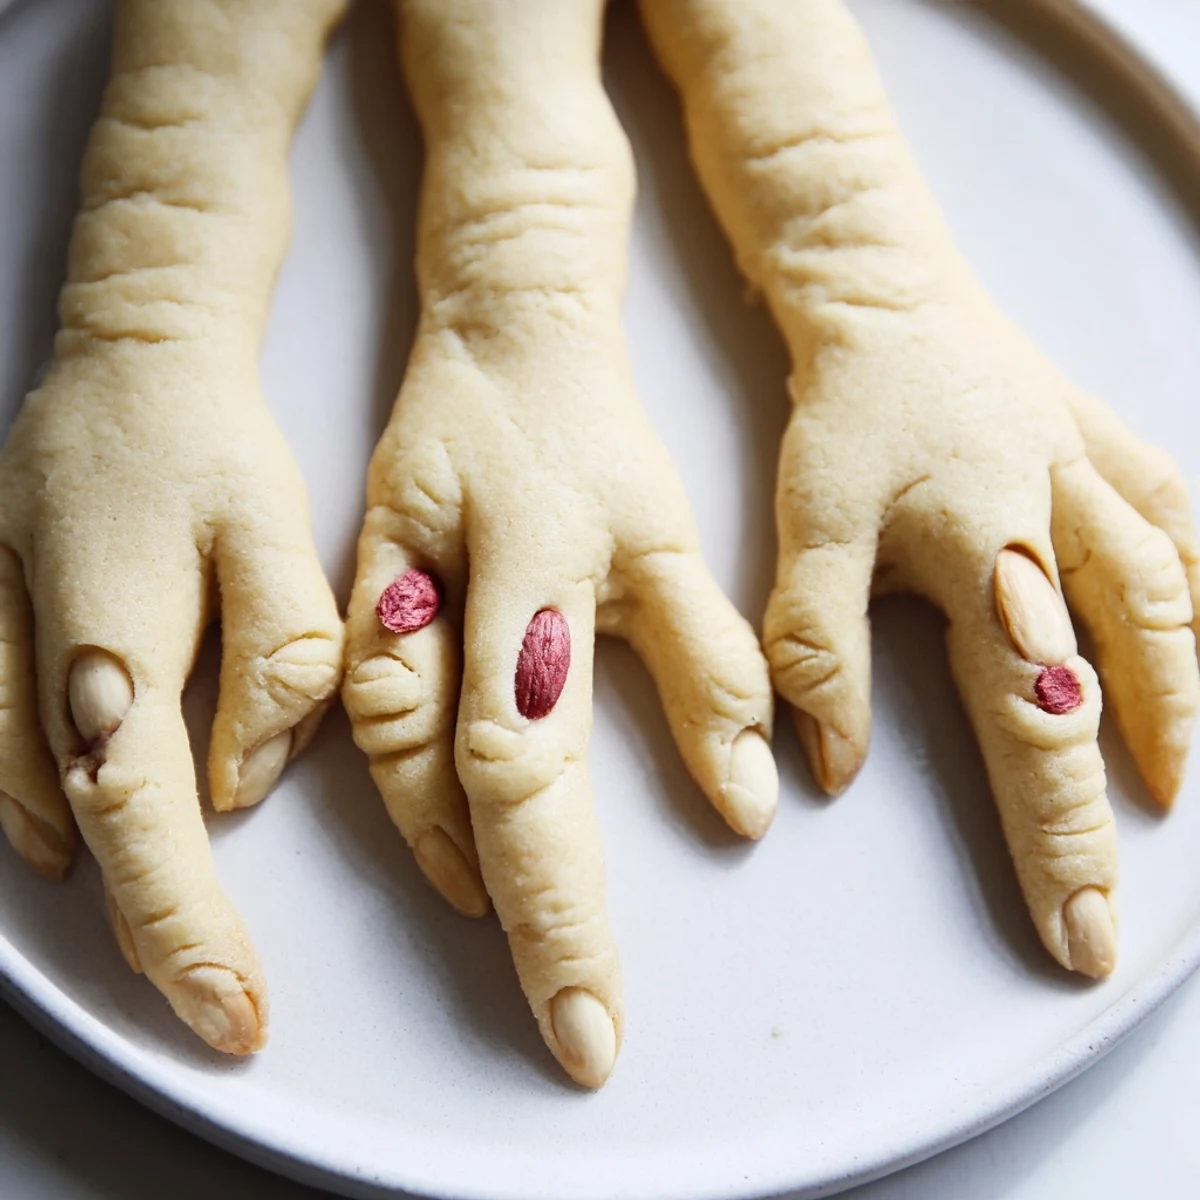
Save These delightfully creepy almond cookies bring the perfect spooky touch to your Halloween festivities. Shaped like witch fingers with knuckle details and a dramatic bloody fingernail effect, they're guaranteed conversation starters at any autumn gathering.
The dough combines buttery vanilla with subtle almond flavor, creating a tender cookie that holds its finger shape beautifully during baking. Each cookie gets a blanched almond pressed into one end for the fingernail, then finished with red gel or jam for that gruesomely realistic detail.
Ready in just 45 minutes with simple ingredients you likely have on hand, these festive treats are easier to make than they look. The dough rolls smoothly into finger shapes, and a quick knife score creates authentic knuckle lines. They bake to a light golden finish, perfect for cooling and adding the final bloody touches.
Last October my eight-year-old niece helped me make these and couldn't stop giggling every time she pressed an almond fingernail into place. We ended up with slightly crooked knuckles and wildly varying finger lengths, which honestly made them even more perfect.
I brought a plate to my office Halloween potluck and watched my usually serious boss do a genuine double take before reaching for one. The conversation around these cookies is always better than the dessert table itself.
Ingredients
- Unsalted butter: Room temperature butter creates that perfect tender crumb that holds its shape during baking
- Granulated sugar: Cream this thoroughly with the butter until the mixture looks pale and fluffy for the best texture
- Egg: One large egg at room temperature binds everything together without making the dough too sticky
- Vanilla and almond extract: This combination gives the cookies their signature flavor that somehow tastes both cozy and slightly mysterious
- All-purpose flour: Measure this by weight if you can because too much flour makes the fingers tough and cracked
- Baking powder and salt: These give the cookies just enough lift without losing that creepy finger shape
- Blanched almonds: Look for whole unbroken almonds because jagged fingernails look more witchy and authentic
- Red gel or strawberry jam: The jam creates a gooier more disturbing blood effect while gel gives you cleaner lines
Instructions
- Preheat and prepare:
- Set your oven to 325°F and line two baking sheets with parchment paper so the cookies don't stick
- Cream the butter and sugar:
- Beat them together until the mixture is pale and fluffy which takes about 3 minutes with a mixer
- Add the egg and extracts:
- Mix in the egg vanilla and almond extract until everything is completely combined
- Whisk the dry ingredients:
- Combine the flour baking powder and salt in a separate bowl so they distribute evenly
- Form the dough:
- Gradually mix the dry ingredients into the wet ones just until a dough forms
- Shape the fingers:
- Roll tablespoon portions into 3 to 4 inch logs and use a knife to create knuckle lines
- Add the fingernails:
- Gently press a blanched almond into one end of each finger
- Bake to perfection:
- Bake for 18 to 20 minutes until they're lightly golden
- Create the bloody effect:
- Remove the almonds add red coloring or jam to the nail bed and press the almonds back in place
 Save
Save My daughter now requests these for her birthday instead of a cake because she loves watching her friends' reactions when they realize what they're eating.
Making Them Extra Creepy
I've learned that tinting small portions of dough with green or gray food coloring creates zombies and witches that look even more authentic. The extra effort pays off in photos.
Serving Suggestions
These pair perfectly with hot apple cider or tucked into a cauldron surrounded by dry ice for dramatic effect at parties.
Storage And Make Ahead Tips
The dough freezes beautifully for up to a month so you can roll and shape fingers straight from frozen dough. Bake them fresh the day of your party.
- Store baked cookies in an airtight container for up to a week
- Add the bloody effect just before serving for maximum freshness
- Freeze undecorated cookies between layers of parchment paper
 Save
Save Hope your Halloween is filled with more treats than tricks this year.
Common Questions
- → How far ahead can I make these cookies?
-
These spooky treats stay fresh for up to 5 days when stored in an airtight container at room temperature. You can prepare the dough and refrigerate it for up to 2 days before rolling and baking, making them perfect for advance Halloween party prep.
- → Can I freeze the dough or baked cookies?
-
Both options work beautifully. Freeze shaped, raw fingers on a baking sheet until firm, then transfer to a freezer bag for up to 3 months. Bake from frozen, adding 2-3 minutes. Baked cookies freeze well for up to 2 months — just add the bloody detail after thawing.
- → What's the best alternative to almonds for the fingernails?
-
Peeled pistachios work beautifully for a greenish witchy look. For nut-free versions, try shaping small bits of marzipan or use candy melts. Even a simple dot of red gel without any nut creates an impressively creepy severed finger effect.
- → How do I get the most realistic blood effect?
-
Strawberry or raspberry jam creates the most disturbingly realistic look — its slight translucence mimics fresh blood perfectly. Warm the jam slightly for easier application. Red gel food coloring works well too, especially mixed with a drop of corn syrup for a gooey texture.
- → Can I make these without the almond flavor?
-
Absolutely. Replace the almond extract with an equal amount of vanilla extract, or try lemon extract for a brighter flavor. The cookies will still bake beautifully and hold their finger shape perfectly without the almond notes.