 Save
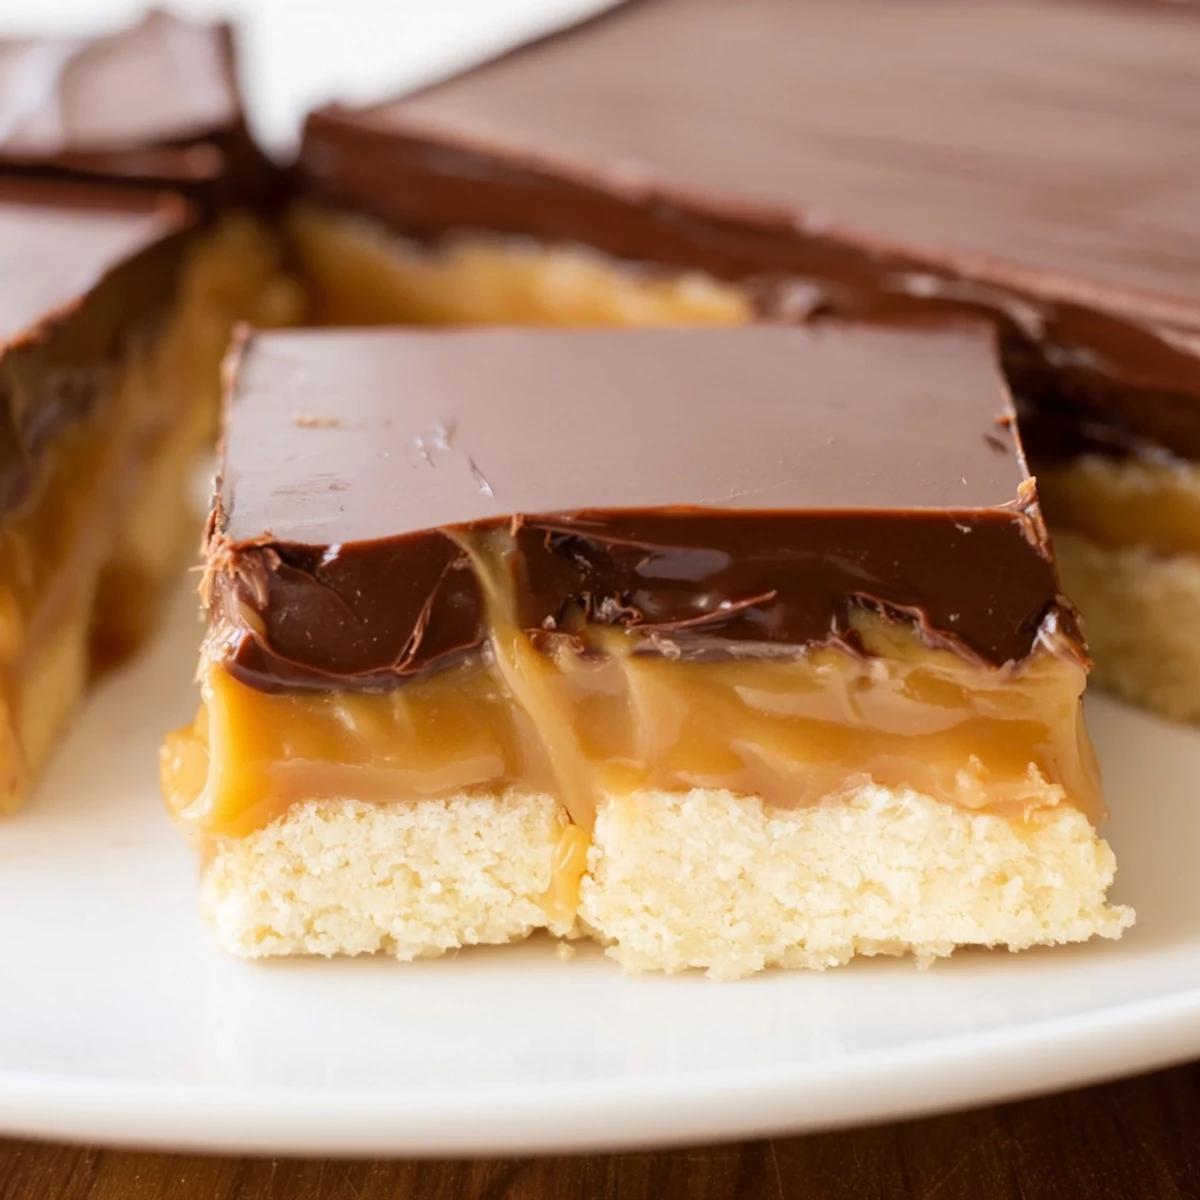
Save These indulgent dessert bars capture the essence of the beloved candy through three distinct layers. The foundation starts with a tender, buttery shortbread that bakes until lightly golden. A rich caramel filling, made with condensed milk and brown sugar, creates the signature chewy center. The assembly finishes with a velvety milk chocolate coating that sets to perfection.
The process requires about 2 hours total, including essential cooling and setting time. Each step builds upon the previous layer, so patience during the setting stages ensures clean cuts and professional-looking bars. The recipe yields 16 generous portions, perfect for gatherings or gifting.
Customization options include sprinkling flaky sea salt over warm caramel for a salted variation, swapping milk chocolate for dark chocolate to balance sweetness, or adjusting the shortbread thickness for personal preference. Proper storage in an airtight container keeps bars fresh for up to five days.
Last summer my neighbor kept raving about these homemade Twix bars she made for her daughter's birthday. I finally cornered her at a block party and demanded the recipe, thinking it would be some elaborate production. Turns out she was right to brag these things are dangerous.
I brought these to a potluck and watched grown adults literally hover around the pan until they were gone. My friend Sarah texted me at 11 pm that night begging for the recipe because her husband would not stop talking about them.
Ingredients
- Unsalted butter: Use room temperature butter for the shortbread so it creams properly with the sugar
- Granulated sugar: Creates that tender crumb in the shortbread layer
- All purpose flour: The structure that holds everything together
- Fine sea salt: A tiny amount balances all the sweetness
- Packed light brown sugar: Gives the caramel its deep rich flavor
- Light corn syrup: Prevents the caramel from crystallizing while it cooks
- Sweetened condensed milk: The magic that makes the caramel creamy and smooth
- Milk chocolate: Chop from bars for the smoothest melt but chips work too
Instructions
- Prep your pan and oven:
- Line a 9x13 inch pan with parchment letting the edges hang over like handles. Heat oven to 350F.
- Make the shortbread:
- Beat softened butter and sugar until fluffy then mix in flour and salt until dough comes together.
- Bake the base:
- Press dough evenly into pan prick all over with fork and bake 18 to 20 minutes until pale gold.
- Cook the caramel:
- Melt butter in heavy pan then stir in brown sugar corn syrup condensed milk and salt. Boil gently 7 to 10 minutes stirring constantly until 225F.
- Add the caramel layer:
- Pour hot caramel over cooled shortbread spreading evenly. Let set 1 hour until firm.
- Melt the chocolate:
- Melt chocolate and butter together in double boiler or microwave in 20 second bursts until smooth.
- Finish the bars:
- Pour chocolate over caramel layer spread evenly and let set 30 minutes. Cut into 16 bars wiping knife between cuts.
 Save
Save My nephew declared these better than anything from a store and proceeded to eat three in one sitting. Now whenever I visit my sister she casually asks if Im bringing the bars like its no big deal.
Making The Perfect Caramel
The caramel layer can feel intimidating but it is actually quite forgiving. Use a heavy bottomed pan so the heat distributes evenly and stir constantly once it starts bubbling.
Getting Clean Cuts
The secret to pretty bars is letting them set completely before cutting. Use a sharp knife and wipe the blade with hot water between every single cut for those clean professional looking edges.
Storage And Make Ahead Tips
These bars keep beautifully in an airtight container for up to five days at room temperature. You can also freeze them layered between parchment for up to three months.
- Let frozen bars thaw in the refrigerator overnight
- Add flaky sea salt on top of the chocolate before it sets for a salted caramel version
- Dark chocolate cuts through the sweetness if you find milk chocolate too rich
 Save
Save These have become my go to for everything from bake sales to holiday gifts. There is something magical about making a candy favorite from scratch that tastes even better than you remember.
Common Questions
- → Can I make these bars ahead of time?
-
Absolutely. These bars actually improve after resting for a day as flavors meld together. Store in an airtight container at room temperature for up to 5 days. The shortbread stays crisp while the caramel remains perfectly chewy.
- → Why do I need to let the shortbread cool completely before adding caramel?
-
Adding warm caramel to hot shortbread would cause the layers to blend rather than remain distinct. Cool shortbread provides a stable foundation, ensuring the caramel sets properly and creates clean, defined layers when sliced.
- → What temperature should the caramel reach?
-
The caramel mixture should reach 225°F (107°C) on a candy thermometer. This temperature ensures proper thickening without becoming too hard. If you don't have a thermometer, look for a rich golden color and thick consistency that slowly coats a spoon.
- → Can I freeze these bars?
-
Yes, freeze for up to 3 months. Wrap individual bars in plastic wrap, then place in a freezer-safe container. Thaw at room temperature for 1 hour before serving. The texture remains excellent after freezing.
- → How do I get clean cuts when slicing?
-
Use a sharp knife warmed under hot water, then wiped dry. Cut through all layers in one decisive motion. Wipe the blade clean between cuts and reheat as needed. For easiest cutting, refrigerate bars for 30 minutes before slicing.
- → Can I use different chocolate types?
-
Certainly. Dark chocolate creates a less sweet contrast, semi-sweet mimics the classic version, or white chocolate offers a unique variation. Ensure your chosen chocolate contains at least 30% cocoa butter for proper setting.