 Save
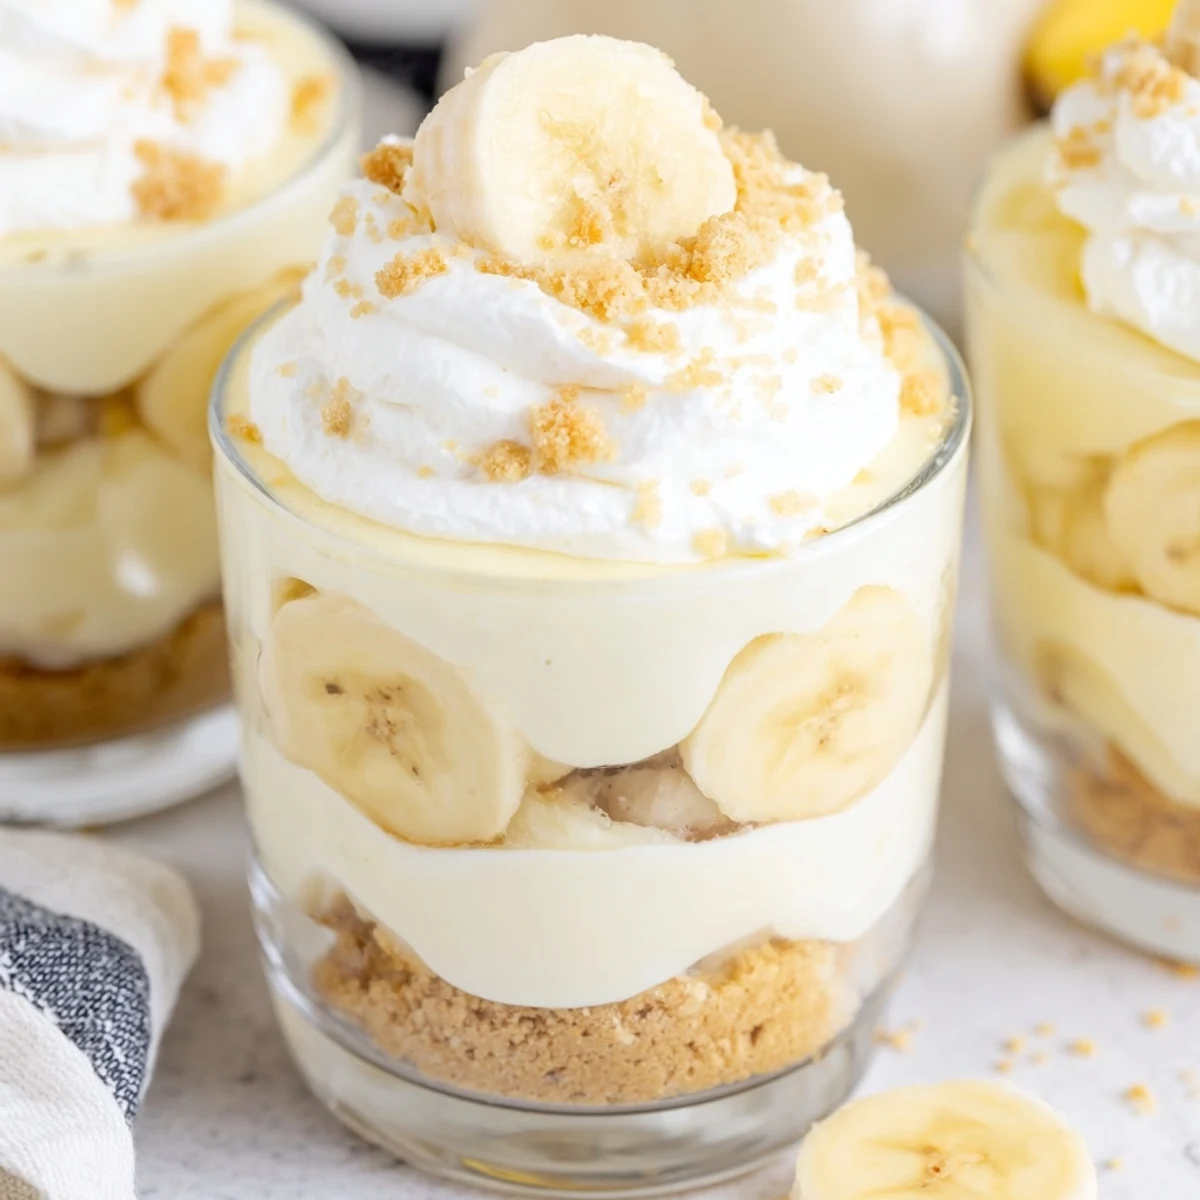
Save These individual cups feature a buttery vanilla wafer crust, velvety cheesecake filling, and classic banana pudding layered with fresh sliced bananas. Each cup is crowned with crunchy wafer crumbs and whipped cream for texture contrast. The entire assembly requires no oven time—just 20 minutes of active prep before chilling to set. Perfect for entertaining or meal prep, these handheld desserts offer all the comfort of traditional banana pudding with the rich indulgence of cheesecake.
The kitchen counter was covered in specks of vanilla wafer dust when my sister walked in and asked what on earth I was making. Those individual cups caught her eye, something about the layers that made dessert feel personal and special. Now they are the first thing she requests for every gathering, no matter how small.
I brought these to a potluck last summer and watched them disappear in under five minutes. My friend Sarah actually went back for seconds before anyone else had even gotten through the line. There is something about having your own portion that makes people feel genuinely cared for.
Ingredients
- 1 cup vanilla wafer cookies, crushed: These humble cookies create the perfect buttery foundation that somehow tastes better than fancy graham crackers
- 2 tbsp unsalted butter, melted: The glue that holds everything together and adds that rich golden flavor
- 8 oz cream cheese, softened: Room temperature is non-negotiable here for that silky smooth texture
- 1/3 cup granulated sugar: Just enough sweetness to let the banana shine through
- 1 tsp pure vanilla extract: Never skip this, it is the difference between good and incredible
- 1 cup heavy whipping cream, cold: The secret to making the cheesecake layer impossibly light
- 1 package instant banana pudding mix: Do not overthink it, the boxed stuff works perfectly here
- 1 1/4 cups cold whole milk: Cold milk is essential for proper pudding setting
- 2 ripe bananas, sliced: Look for bananas with tiny brown spots for maximum sweetness
- Additional vanilla wafer crumbs: For that beautiful finishing crunch on top
- Fresh banana slices: The crowning glory that makes everyone know what awaits inside
- Whipped cream: Optional but honestly, why would you deny yourself this joy
Instructions
- Build the foundation:
- Combine crushed vanilla wafers and melted butter until every crumb is coated and smells like heaven. Press about two tablespoons into the bottom of each serving cup, using the back of a spoon to create an even layer that will hold everything together beautifully.
- Whip up the cheesecake base:
- Beat softened cream cheese, sugar, and vanilla until the mixture is completely smooth with no lumps remaining. In a separate bowl, whip cold heavy cream until stiff peaks form, then gently fold it into the cream cheese mixture until fully combined.
- Prepare the pudding layer:
- Whisk together the instant banana pudding mix and cold milk for exactly two minutes until it thickens into that perfect pudding consistency. Let it sit for a few minutes while you assemble the rest.
- Layer the magic:
- Spoon half the cheesecake mixture over the crust in each cup, followed by a layer of fresh banana slices. Divide the banana pudding evenly among the cups, then top with the remaining cheesecake mixture.
- Add the finishing touches:
- Sprinkle each cup with additional wafer crumbs, arrange fresh banana slices on top, and add a generous dollop of whipped cream if you are feeling extra indulgent. Cover and refrigerate for at least two hours before serving.
 Save
Save My grandmother used to say that dessert made in individual portions tastes better because everyone gets their own special moment. She was right, there is something undeniably wonderful about holding your own little cup of happiness.
Make Ahead Magic
These cups can be assembled up to 24 hours in advance, which makes them the ultimate entertainer's secret weapon. Just wait to add the fresh banana slices and whipped cream until right before serving to keep everything looking pristine.
Banana Wisdom
If you are worried about bananas turning brown, toss the slices lightly in lemon juice before arranging them on top. The slight brightness actually complements the sweet cream beautifully while keeping your presentation photo-worthy for hours.
Serving Suggestions
Clear glass cups or mason jars let those beautiful layers shine through before anyone even takes a bite. Set up a little toppings bar with extra whipped cream, crushed wafers, and even some caramel sauce for guests to customize.
- Chill your serving glasses beforehand for extra refreshing contrast
- Use a piping bag for the cheesecake layers if you want restaurant-perfect edges
- These travel surprisingly well if you keep them upright
 Save
Save Watch how quickly these disappear at your next gathering. There is something about having your own perfect little portion that makes dessert feel even more special.
Common Questions
- → Can I make these cups ahead of time?
-
Yes, you can prepare these cups up to 24 hours in advance. For best results, add fresh banana slices and wafer crumb toppings just before serving to maintain optimal texture and prevent browning.
- → What type of pudding mix works best?
-
Instant banana pudding mix provides the most consistent results and sets properly without cooking. Traditional cook-and-serve pudding can be used but requires additional chilling time to firm up before layering.
- → How do I prevent bananas from turning brown?
-
Toss sliced bananas lightly in lemon juice before layering to slow oxidation. Alternatively, add banana slices immediately before serving to maintain their fresh appearance and bright color.
- → Can I use different types of cookies for the crust?
-
Vanilla wafers are traditional, but graham crackers, Nilla wafers, or even shortbread cookies work beautifully. Adjust butter slightly to achieve the right crumb texture for pressing.
- → What size cups should I use?
-
Small mason jars, dessert glasses, or ramekins holding about 6-8 ounces work perfectly. You'll need six containers to accommodate all servings with proper layering depth.
- → Can I substitute the cream cheese?
-
Full-fat cream cheese provides the richest texture and stability. Neufchâtel cheese offers a slightly lighter alternative, but avoid whipped cream cheese as it can make the filling too airy.