 Save
Save This delicate Japanese-style cheesecake features a unique soufflé-like texture that's incredibly light and cloudlike. Unlike dense traditional versions, this creation uses whipped egg whites and a water bath technique to achieve its signature fluffiness. The result is a melt-in-your-mouth dessert with subtle lemon notes and just the right amount of sweetness.
The first time I saw a Japanese cheesecake rise in the oven, I actually gasped. It grows like a golden soufflé, towering over the pan, and my kitchen filled with this warm vanilla sweetness that made everyone wander in to see what was happening. Then I watched it deflate slightly as it cooled, and I panicked—something was wrong. But that gentle settling is exactly what creates those signature airy layers, and the first bite confirmed I hadnt ruined anything at all.
I made this for my mothers birthday last spring, and she kept asking what restaurant Id ordered it from. Watching her face light up when she took that first bite—the surprise that something so light could taste so rich—was better than any gift I could have wrapped. Now she requests it for every family gathering, and Ive learned to double the recipe because one cake disappears faster than youd believe.
Ingredients
- Cream cheese: Room temperature is nonnegotiable here—Ive tried rushing it and ended up with lumpy batter that never quite smoothed out
- Unsalted butter: Let it soften alongside the cream cheese so both incorporate easily into the warm milk mixture
- Whole milk: Creates that creamy base, though Ive accidentally used 2% and nobody noticed the difference
- Cake flour: Do not skip this or try allpurpose—the lower protein content is what keeps the texture delicate instead of breadlike
- Cornstarch: Works with the cake flour to stabilize the structure without weighing it down
- Granulated sugar: Split between the batter and the egg whites, and measure carefully because sugar affects how stiff your meringue gets
- Salt: Just enough to brighten the flavors and prevent the cake from tasting flat
- Egg yolks: These add richness and help bind everything together into a smooth custardlike base
- Egg whites: The magic ingredient that creates the soufflé texture, and they need to be beaten to actual stiff peaks—no shortcuts
- Lemon juice: Cuts through the richness just enough so each bite feels light, not heavy
- Vanilla extract: Use the good stuff if you have it because the flavor really comes through in something so delicate
- Lemon zest: Optional but I never skip it—those tiny flecks of brightness make the cake feel more sophisticated
Instructions
- Prep your pan and preheat the oven:
- Line an 8inch round cake pan completely with parchment, bottom and sides, then wrap the whole thing in foil like youre tucking it in for bed. This waterproofing step matters—water seeping in during the water bath will ruin the texture, and Ive learned this the disappointing way. Preheat to 320°F.
- Melt the dairy base:
- Set a heatproof bowl over simmering water and melt cream cheese, butter, and milk together, stirring until the mixture is completely smooth. Dont walk away during this step because it can overheat and separate, which creates a grainy texture that never quite recovers.
- Add the dry ingredients:
- Sift the cake flour, cornstarch, and salt directly into the warm dairy mixture, whisking constantly to break up any lumps. The batter will thicken slightly, which is normal—just keep whisking until its completely smooth.
- Whisk in the yolks and flavor:
- Add egg yolks, lemon juice, vanilla, and zest if youre using it, mixing until the batter is glossy and uniform. Set this aside and focus on the egg whites—this base can wait while you get the meringue right.
- Beat the egg whites:
- In a completely clean bowl, beat egg whites until foamy, then gradually add 70g sugar in three batches while continuing to beat. You want stiff glossy peaks that hold their shape when you lift the beaters—this is what gives the cake its lift, so dont underbeat.
- Fold everything together:
- Start with one third of the meringue, folding it in gently to lighten the dense batter, then add the remaining meringue in two parts. Go slow and use a rubber spatula—overmixing will deflate those carefully beaten whites and youll lose the airy texture.
- Transfer and tap:
- Pour the batter into your prepared pan and tap it firmly on the counter a few times to release trapped air bubbles. This simple step prevents large holes from forming inside the cake as it bakes.
- Set up the water bath:
- Place the cake pan inside a larger roasting pan, then carefully pour hot water into the outer pan until it reaches halfway up the sides. The water bath is essential—it keeps the baking environment gentle and moist, which prevents cracking and ensures even cooking.
- Bake until golden:
- Bake for 60 to 70 minutes until the top is golden brown and set, and a skewer inserted in the center comes out clean. Every oven is different, so start checking at 60 minutes—overbaking makes the texture dry instead of creamy.
- Cool gradually:
- Turn off the oven and crack the door open slightly, leaving the cake inside for 15 minutes. This slow cooling prevents the dramatic temperature shock that causes cracks, and Ive learned that patience here pays off.
- Chill completely:
- Let the cake cool completely in the pan before trying to unmold, then refrigerate for at least 2 hours. The texture improves as it chills—something about the flavors settling and the structure firming up makes it taste better the next day.
 Save
Save My sister accidentally left one in the fridge overnight and called me in a panic, convinced it was ruined. We ate it the next morning anyway, and it was actually better—more set, more flavorful, and the texture had firmed into something sliceable rather than delicate. Now I always make it the day before I plan to serve it.
Getting The Rise Right
The dramatic rise you see in photos happens because of the meringue, and it can be intimidating to watch your cake grow so tall. Dont worry if it towers above the pan—that browned top will settle slightly as it cools, creating those beautiful internal layers. What you dont want is a flat cake, which usually means your egg whites werent beaten to true stiffness or you folded too aggressively.
Serving Suggestions
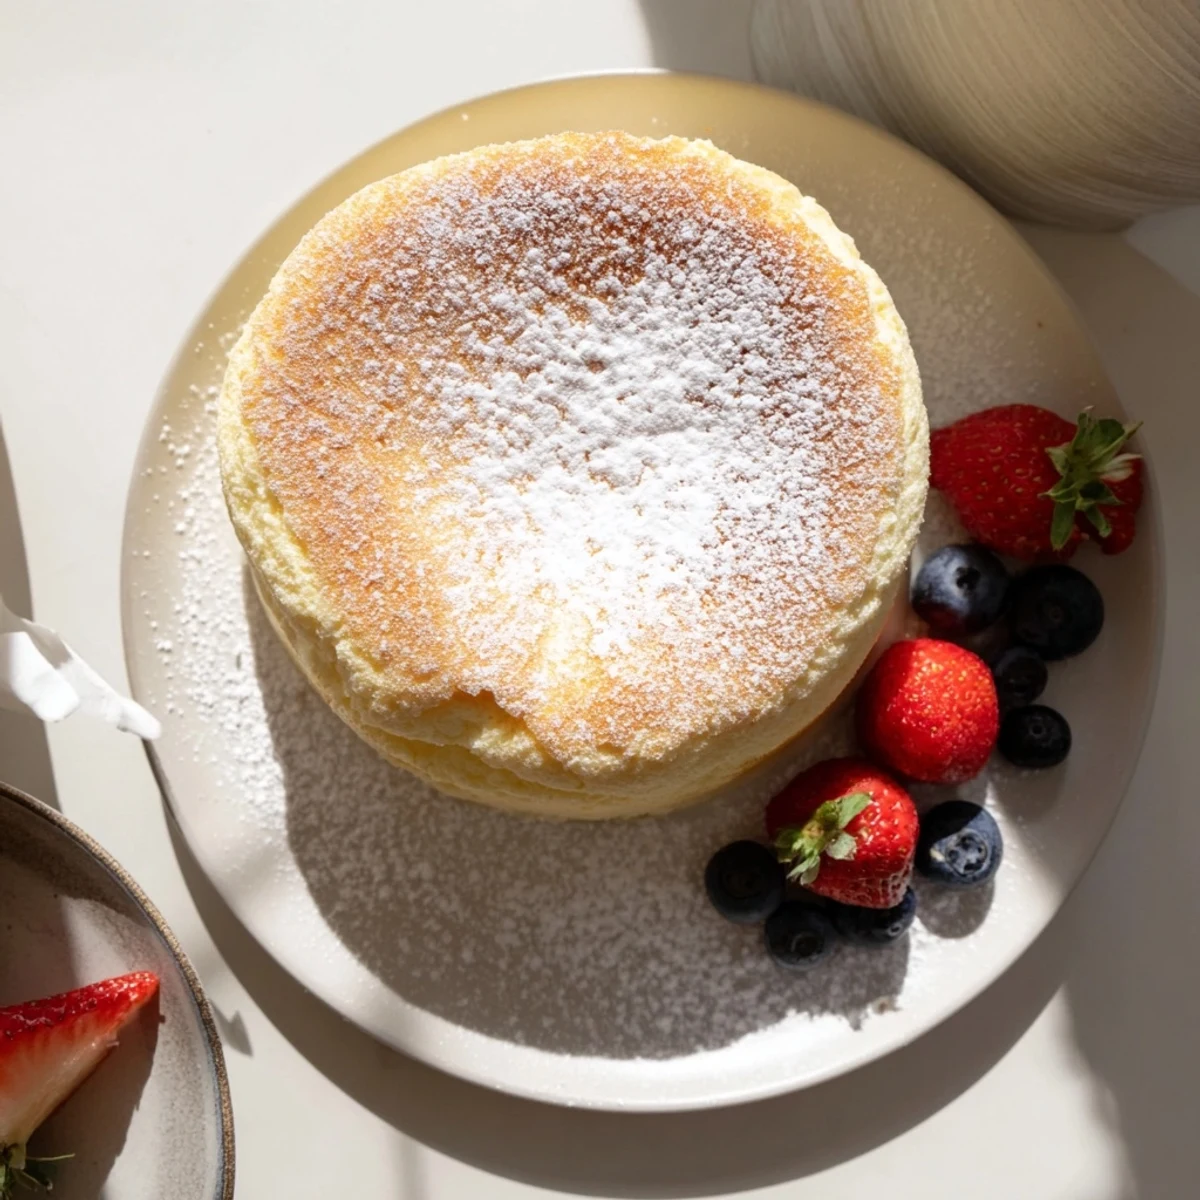
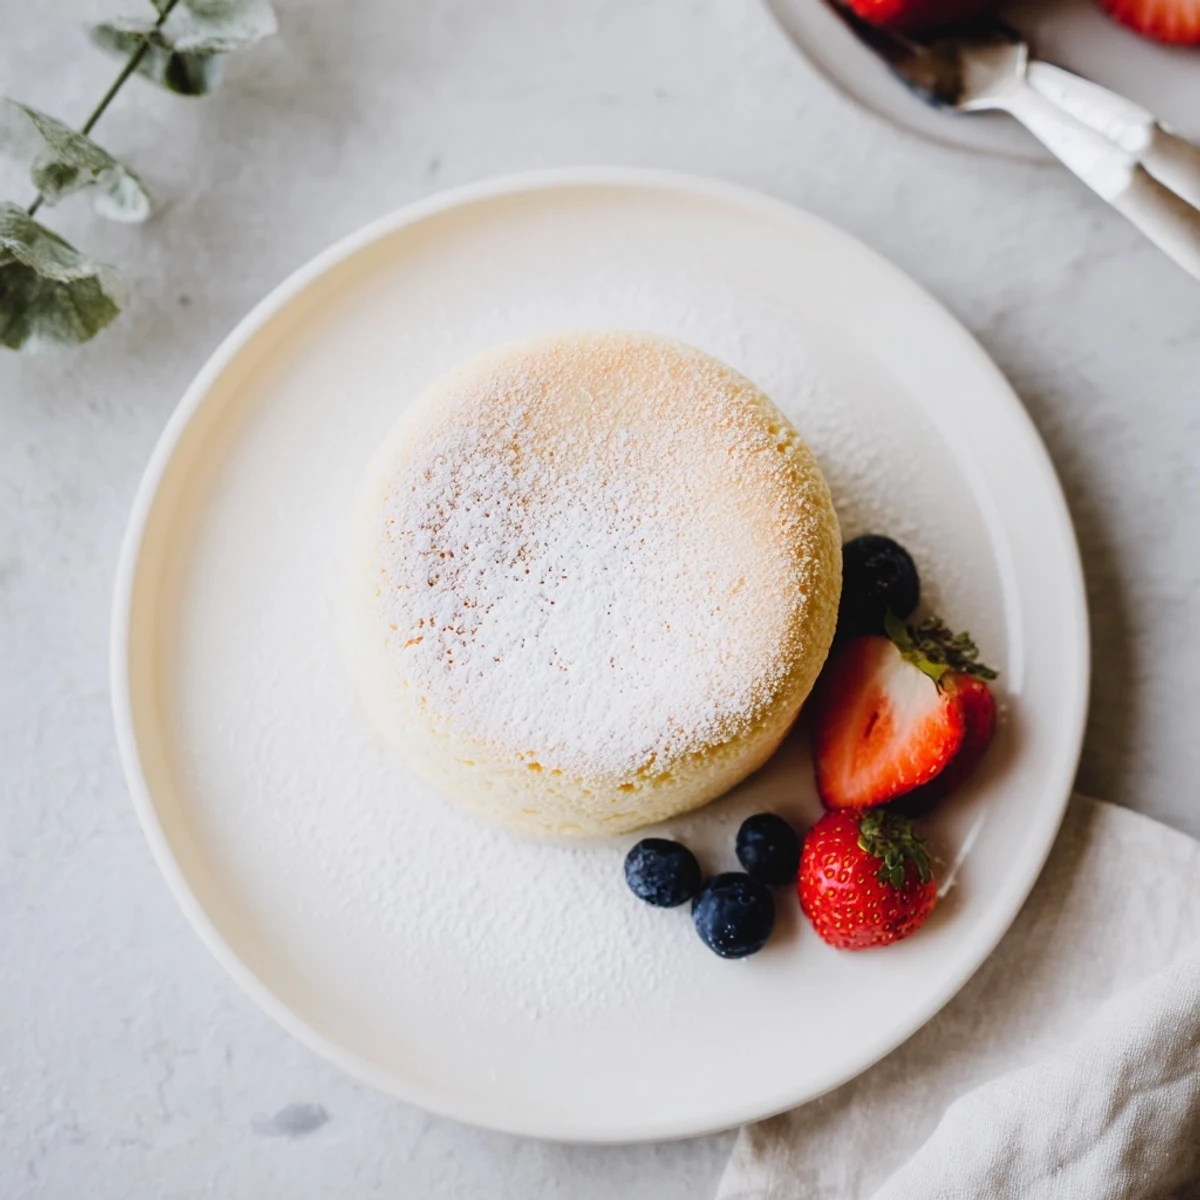
This cheesecake shines with minimal embellishment, though a light dusting of powdered sugar right before serving makes it look bakerybeautiful. Fresh berries are the classic accompaniment—their tartness balances the subtle sweetness perfectly. I love it with a cup of green tea, which feels appropriately thematic, though coffee works just as well if you need something stronger in the morning.
Storage And Make Ahead Tips
The cake actually improves after a night in the fridge, so its an ideal makeahead dessert for dinner parties or special occasions. Store it in the pan with a loose cover of foil, or transfer to a cake keeper once its fully chilled. It keeps well for 3 to 4 days, though in my house it rarely lasts past day two.
- Bring it to room temperature for 20 minutes before serving so the texture feels creamy rather than cold
- Avoid covering it tightly while its still warm—condensation will make the top soggy
- Freeze individual slices wrapped in plastic if you want to stash some for later
 Save
Save There is something deeply satisfying about slicing into a cheesecake you made from scratch, especially one that looks this impressive and tastes this delicate. It is the kind of dessert that makes people pause between bites.
Common Questions
- → What makes Japanese cheesecake fluffy?
-
The secret lies in beaten egg whites folded into the batter, creating a meringue that gives the cheesecake its signature soufflé-like texture. The water bath baking method also maintains moisture and prevents cracks.
- → Can I use all-purpose flour instead of cake flour?
-
Cake flour is essential for achieving the delicate, airy texture. All-purpose flour will result in a denser, heavier final product that won't have the same cloudlike consistency.
- → Why does my cheesecake crack during baking?
-
Cracking usually occurs from rapid temperature changes or overbaking. Using a proper water bath and leaving the oven door ajar after baking helps prevent cracking by allowing gradual cooling.
- → How long should I chill before serving?
-
Refrigerate for at least 2 hours to set completely. The cheesecake will have better texture and flavor when fully chilled. It can be made a day ahead and stored in the refrigerator.
- → What's the best way to slice this cheesecake?
-
Use a sharp knife dipped in hot water and wiped clean between cuts. This creates clean slices without dragging the delicate texture. Serve chilled with powdered sugar and fresh berries.