 Save
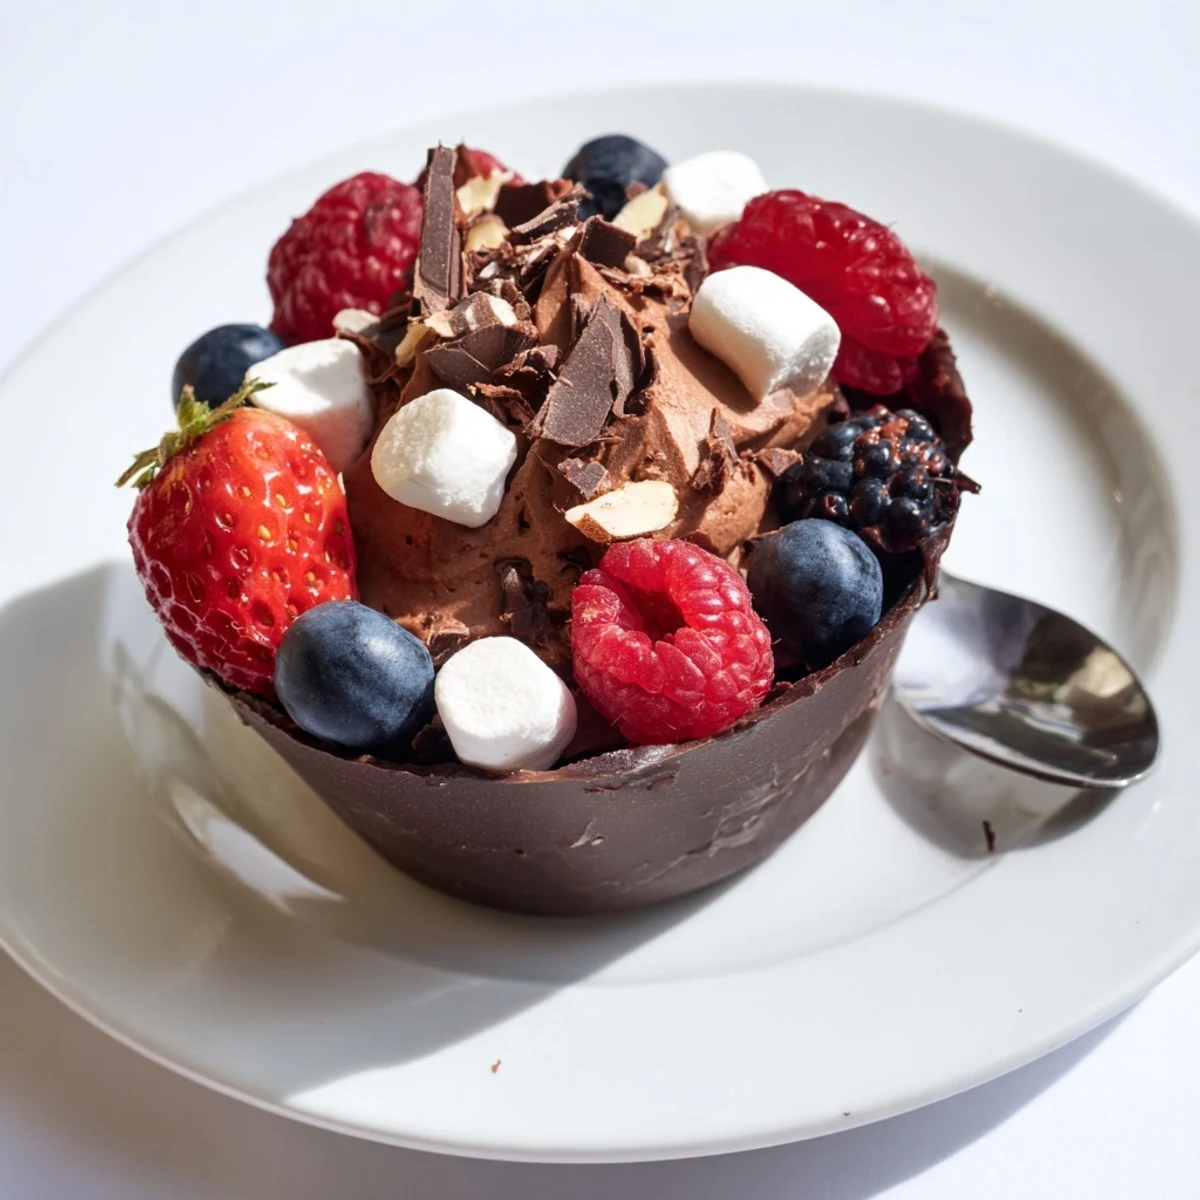
Save These stunning chocolate grazing cups feature handcrafted edible chocolate cups filled with silky dark chocolate mousse. Each cup is generously topped with fresh mixed berries, chopped nuts, mini marshmallows, and chocolate curls. The combination of velvety mousse, vibrant fruits, and crunchy textures creates an irresistible dessert experience. Perfect for elegant dessert tables, celebrations, or when you want to impress guests with individual portions. The preparation involves melting and molding chocolate cups, whipping creamy mousse, and artfully arranging toppings for maximum visual appeal.
The moment I first served these at my sister's engagement party, watching guests' eyes widen as they realized those delicate chocolate cups were entirely edible—pure magic. I'd spent the morning carefully painting chocolate into cupcake liners, my kitchen smelling like a confectionery dream, wondering if they'd actually release from the molds. When they did, perfectly formed and glistening, I felt like I'd pulled off a culinary heist.
Last Christmas, my niece asked if she could help assemble them, her small hands carefully placing each raspberry like it was a precious jewel. We ended up with chocolate smeared across both our cheeks and the most haphazardly beautiful cups of the bunch. Those imperfect ones disappeared first, proving that sometimes joy matters more than precision.
Ingredients
- 200 g dark chocolate (60% cocoa), chopped: Higher cocoa percentage creates cups that hold their shape better at room temperature—trust me, I learned this the messy way
- 200 ml heavy cream: Cold from the fridge is non-negotiable for achieving those cloud-like peaks that make mousse so dreamy
- 100 g dark chocolate, chopped: Let this cool slightly before folding, or you'll deflate your whipped cream into a sad puddle
- 2 tbsp powdered sugar: Sift it first to prevent those tiny sugar lumps that ruin the silky texture
- 1 tsp vanilla extract: Pure extract makes a difference here—artificial vanillas can leave a weird aftertaste in chocolate
- 1 cup fresh mixed berries: Keep them dry and cold until the last second to prevent weeping into your mousse
- 2 tbsp chopped nuts: Toast them lightly first for that nutty aroma that hits you before you even take a bite
- 2 tbsp mini marshmallows: These add playful texture and nostalgia, like the s'mores we made at summer camp
- 2 tbsp chocolate curls: Use a vegetable peeler on room-temperature chocolate for effortless, professional-looking spirals
- 1 tbsp edible gold leaf (optional): A tiny touch goes absurdly far—just a few flakes make these look impossibly expensive
Instructions
- Craft your chocolate vessels:
- Melt the chocolate in 30-second bursts, stirring between each, until it's glossy and smooth. Paint the inside of your liners in thin, even layers—the thinner the coating, the more elegant the final cup. Pop them in the fridge for 20 minutes, then repeat with a second layer for extra insurance against cracks.
- Whip up some mousse magic:
- Melt your remaining chocolate and let it cool until it feels barely warm to the touch. Meanwhile, whip that cold cream with sugar and vanilla until soft peaks form—over-whipping and you'll end up with butter instead of mousse. Fold a dollop of cream into the chocolate first to lighten it, then gently incorporate the rest until no streaks remain.
- Assemble your edible art:
- Carefully peel those chocolate cups from their liners, trying not to let your excitement shake them apart. Pipe or spoon the mousse in, leaving just enough room for a crown of toppings. Arrange your berries, nuts, marshmallows, and chocolate curls like tiny edible landscapes, finishing with those precious gold flakes if you're feeling fancy.
- Let them set and shine:
- Give the assembled cups at least 20 minutes in the fridge to firm up slightly. They're best served chilled but not ice-cold—the flavors sing when the chocolate has softened just a bit at room temperature.
 Save
Save My friend Sarah, who claims she can't cook anything more complicated than toast, made these for her dinner club last month. She sent me a photo at midnight—chocolate smudged on her forehead, the most lopsided but proud cup held triumphantly in her hand, and the message 'I feel like a wizard.'
Making Ahead
You can prepare the chocolate cups up to three days in advance—store them between layers of parchment paper in an airtight container. The mousse holds beautifully for 24 hours in the fridge, though I'd wait to garnish until right before serving.
Flavor Adventures
Once you've mastered the basic technique, try folding orange zest into your mousse or swapping in white chocolate cups filled with dark mousse for dramatic contrast. I once made a batch with espresso powder in the chocolate, and the mocha flavor made them vanish even faster than usual.
Presentation Secrets
These cups are showstoppers on their own, but placing them on a wooden board or slate tray elevates them from dessert to centerpiece. Scatter some whole berries and extra nuts around them for that abundant, overflowing feeling that makes people instinctively reach for one.
- Keep your chocolate cups away from direct sunlight or warm lamps—they'll start melting before anyone can appreciate them
- Have extra toppings on the side for guests who want to customize their perfect bite
- Small serving spoons or tiny forks make these feel more elegant than finger food, though nobody will judge if you dive in hands-first
 Save
Save There's something deeply satisfying about food you can eat entirely—no utensils, no waste, just pure enjoyment from first bite to last crumb. These cups remind me that the best desserts are the ones that make you feel like a kid again, even while you're dressed up for something fancy.
Common Questions
- → Can I make chocolate cups ahead of time?
-
Yes, prepare the chocolate cups up to 2 days in advance and store them in an airtight container at cool room temperature. Assemble with mousse and toppings shortly before serving for best texture and presentation.
- → What other toppings work well?
-
Try crushed cookies, shredded coconut, caramel drizzle, fresh mint leaves, candied citrus peel, or crushed pretzels for sweet and salty variation. Seasonal fruits and edible flowers also make beautiful additions.
- → Can I use milk or white chocolate instead?
-
Absolutely. Milk chocolate creates a sweeter, creamier profile while white chocolate offers vanilla notes. Just note that white chocolate may be softer when melted, so chill cups longer before removing liners.
- → How do I prevent chocolate cups from cracking?
-
Ensure your chocolate is properly tempered and not overheated. Apply thick, even layers to the liners and chill completely before attempting to remove. Work in a cool environment to prevent melting.
- → Can these be made vegan?
-
Yes. Use dairy-free dark chocolate and coconut cream or plant-based heavy cream alternative for the mousse. Substitute powdered sugar with vegan confectioner's sugar and skip marshmallows or use vegan versions.
- → What's the best way to melt chocolate?
-
A double boiler provides the most control—place chopped chocolate in a heatproof bowl over simmering water, stirring until smooth. If using microwave, heat in 20-second intervals, stirring between each to prevent seizing.